
Replacing the front sight on a Pietta replica Remington New Army revolver with a dovetail front sight
Steve Sheldon
2015
Well, like most black powder firearms, my Pietta Remington New Army revolver did not shoot to point of aim. Worse, the front sight is a non-adjustable post sight. I found the most accurate group to be with 18 grains of 3F Goex, with Cream of Wheat filler to bring the ball to the face of the cylinder during loading. The ball is a .457 ball cast using a Lee mold. But it shot about 2" to the left.
The factory post is pretty thin, so there was not much material to file to move the post to the right. So I decided to put in a dovetail front sight that I could adjust as needed. I bought a dovetail front sight from S&S Firearms. Unfortunately, my local gunsmith's mill was out of commission, and after waiting a couple of years I decided to have a go at cutting my own dovetail using files. Another possibility would be to simply remove the original sight, and then solder in a new round post, and then file the round post into a flat blade, adjusting how much material you remove from one side or the other to adjust windage.
In order to do this job you will need the new dovetail sight, and some metal-cutting files. In particular you will need a 3-sided file to cut the undercut of the dovetail. You can buy these very cheaply as part of a set from Harbor Freight. You will want to grind one of the 3 sides smooth so that the file is not cutting downward while you are cutting the undercut.
Before I started, I practiced cutting a test dovetail into a scrap piece of square stock I had lying around. I suggest you also cut a test slot before working on your actual firearm.
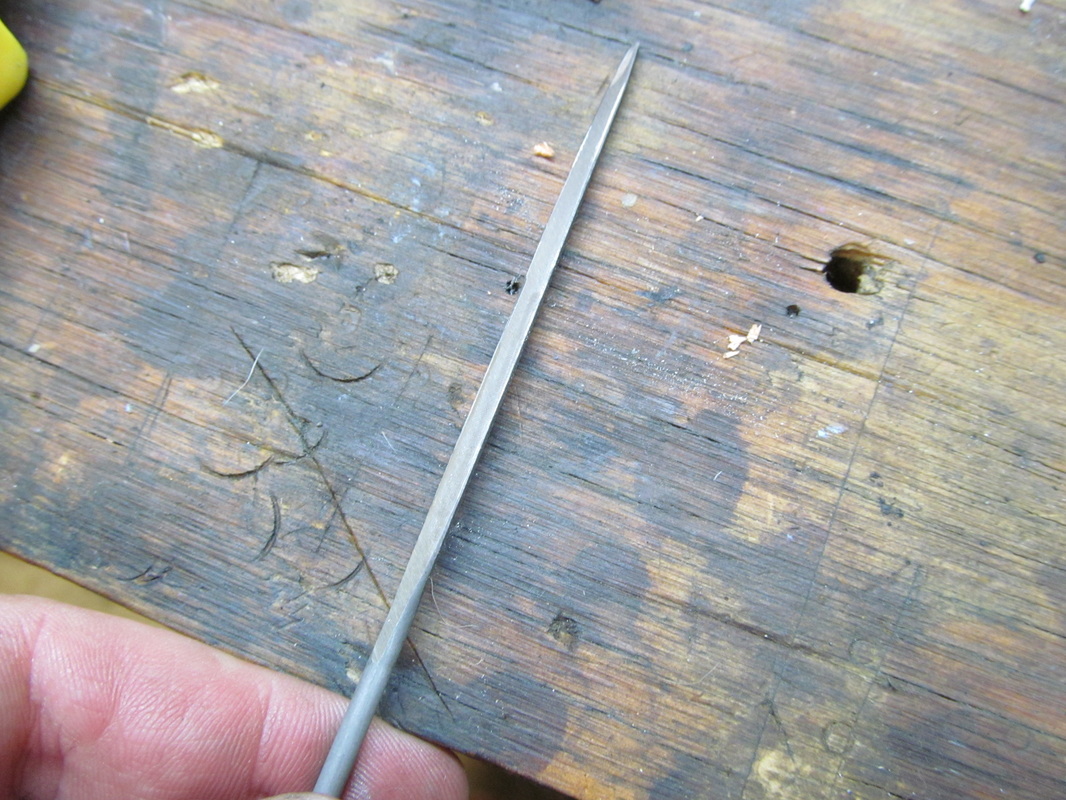
|
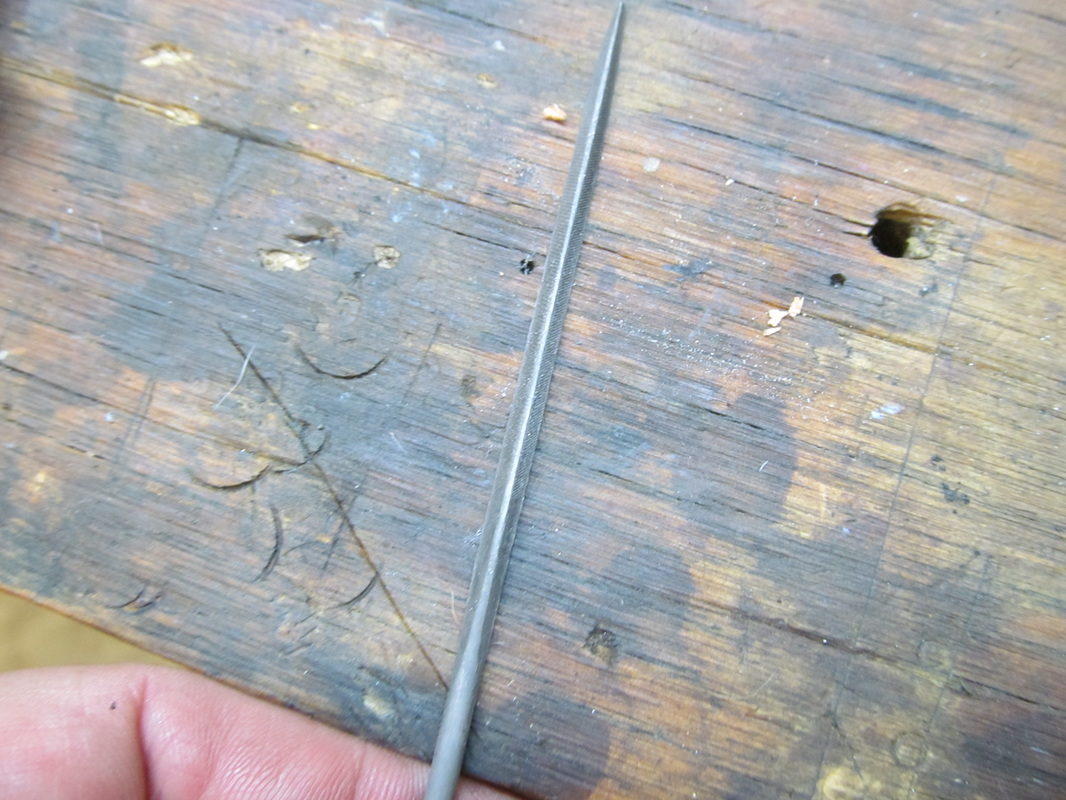
|
Triangular file. One side ground smooth.
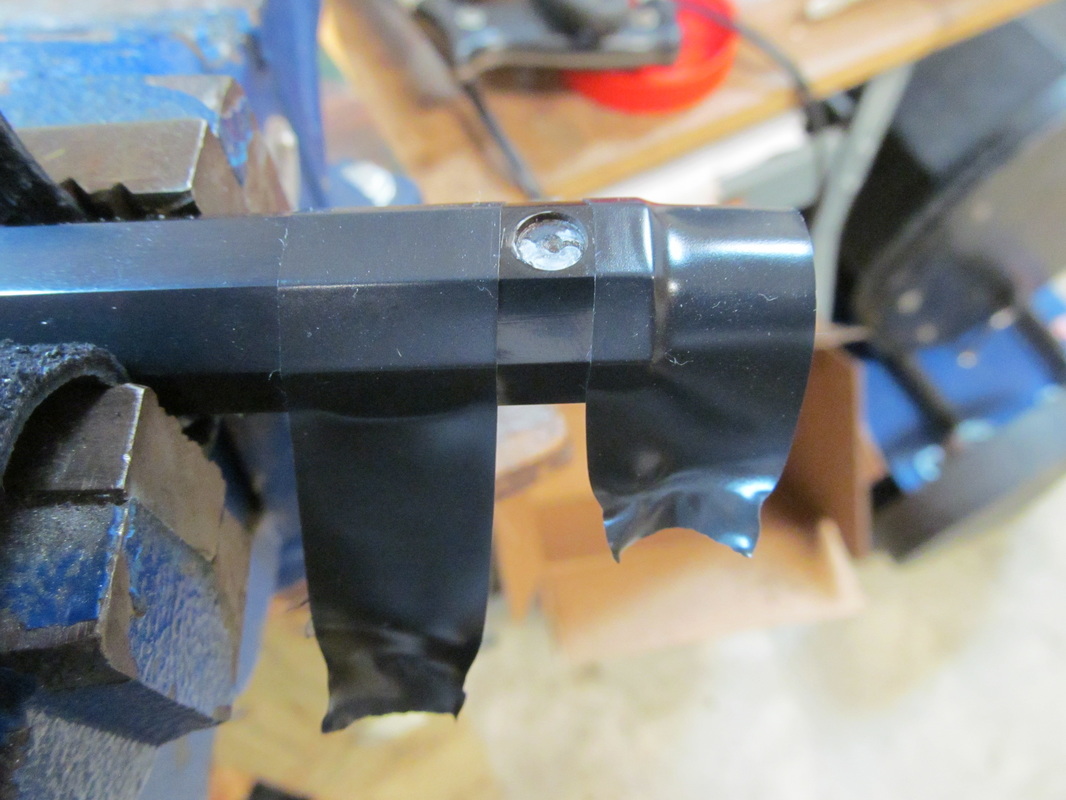
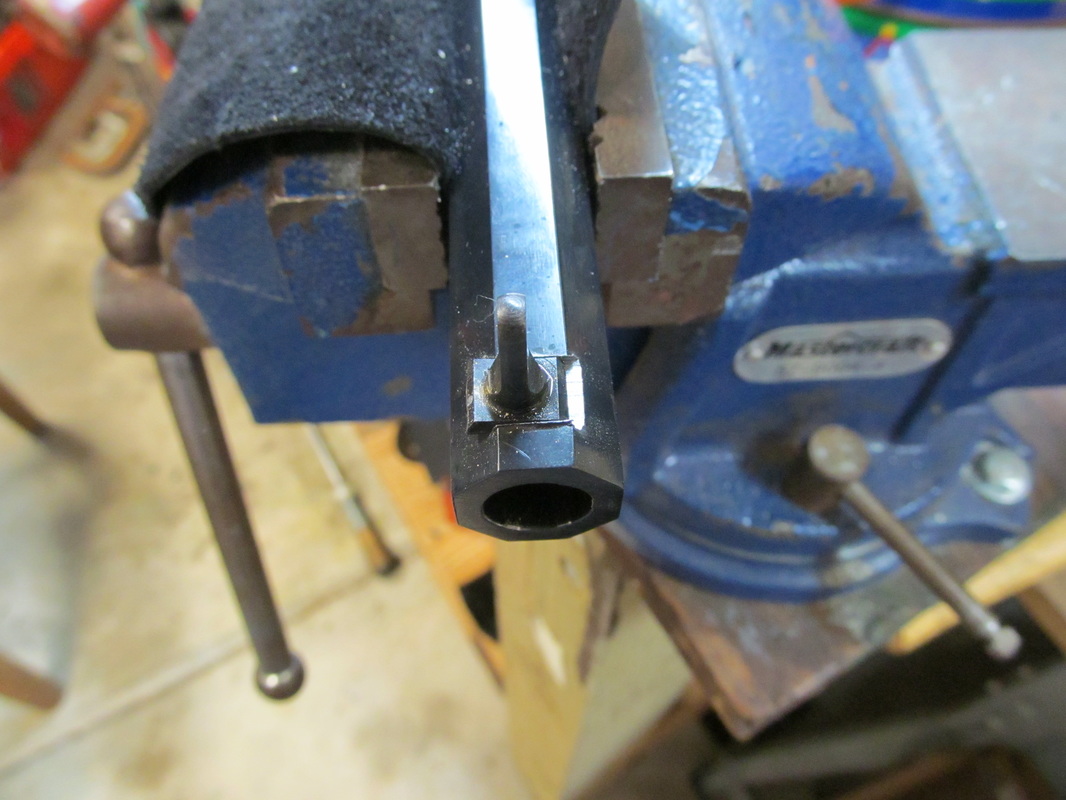
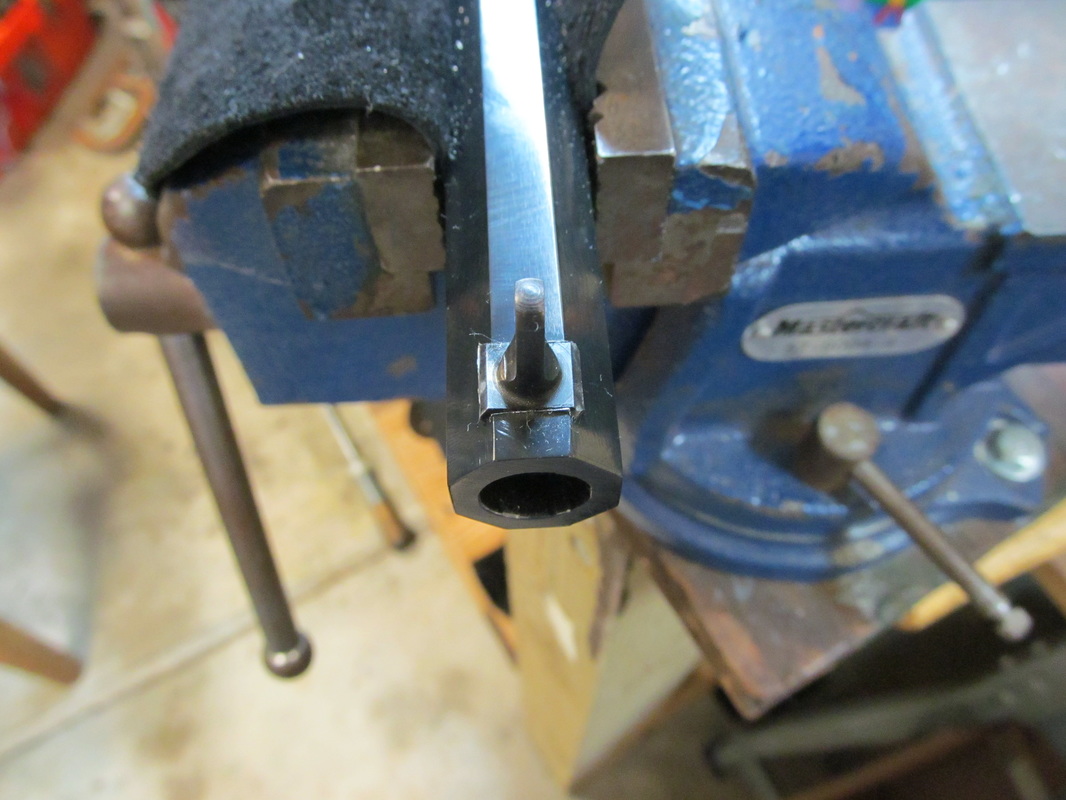
The first thing I had to do was remove the original sight. I tried using a crescent wrench on the flat part of the sight, thinking to twist it off, but all this did was twist off the blade part of the post. I then carefully applied electrical tape on the barrel around the post, and gripped it with vice grip pliers. I was then able to twist off the post.
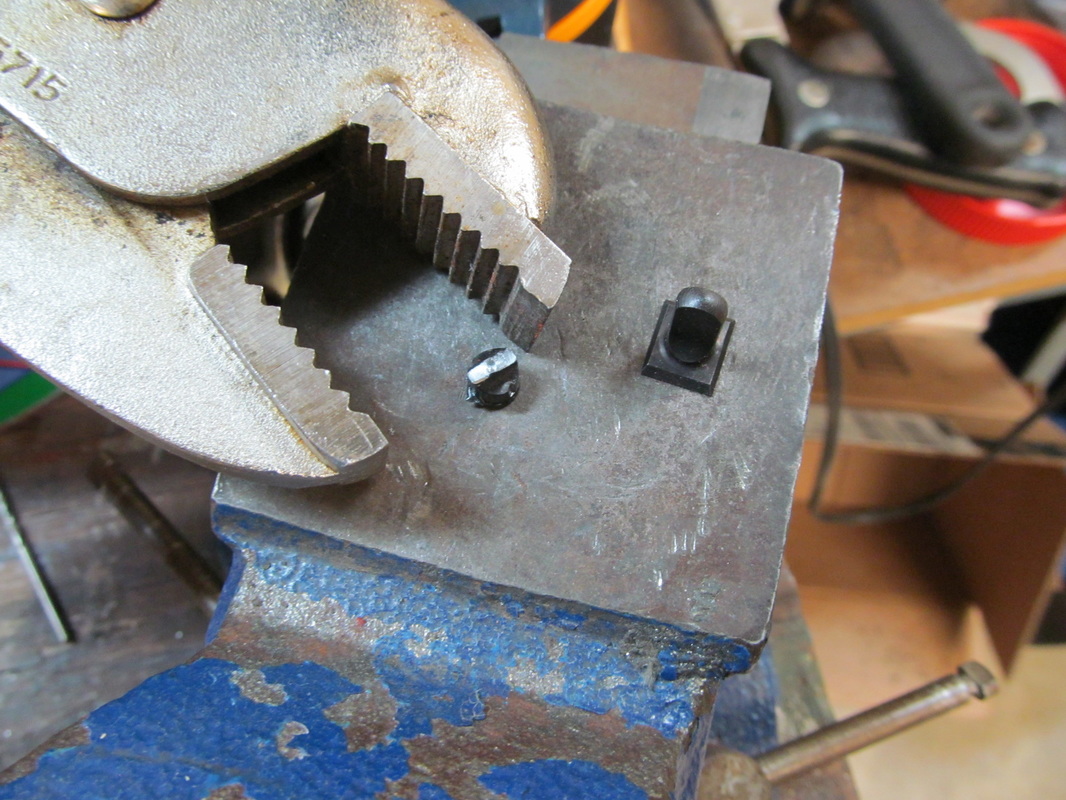
|
|
Removing the original post sight.
Next it is time to get ready to cut the dovetail. First you need to measure how wide the flat is on the new dovetail, being sure you are measuring front to rear, not side to side as I'm doing in my picture below!
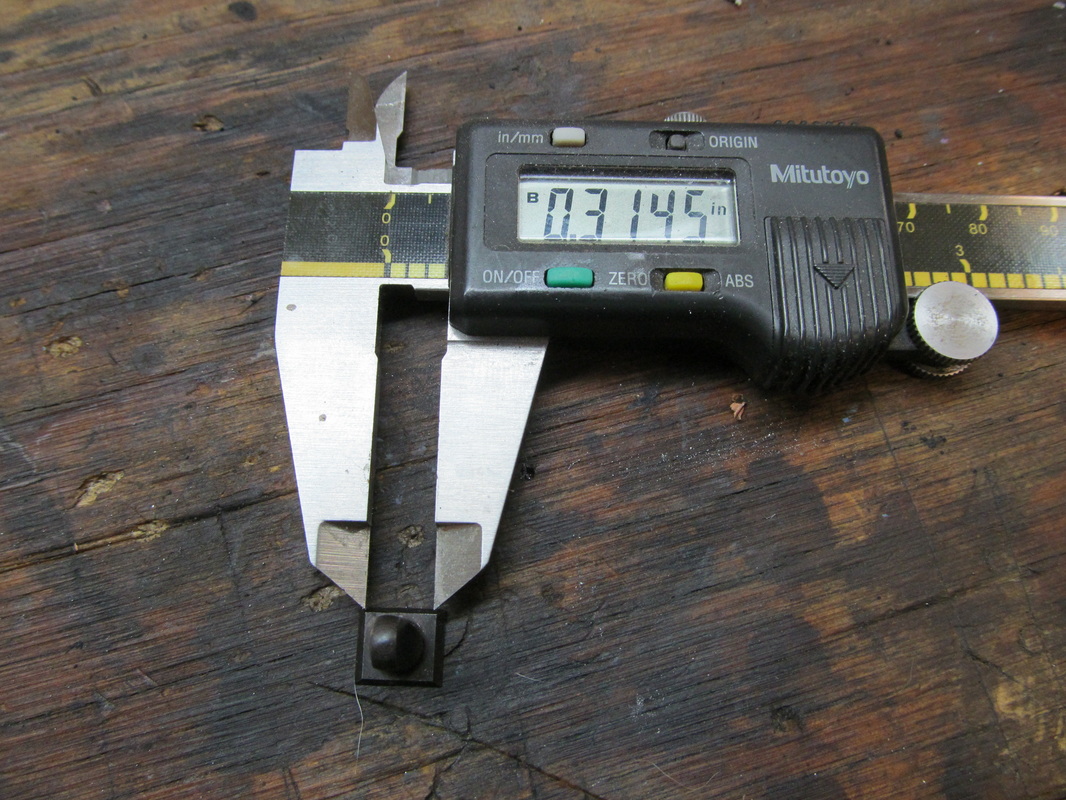
Measuring the flat. Be sure to measure front-to-rear, not side-to-side as shown.
With this measurement, use electrical tape to mark off the front and rear edges of the slot.
Marking the slot with electrical tape.
Next we need to measure the thickness of the sight base so that we know how deep to cut our slot.
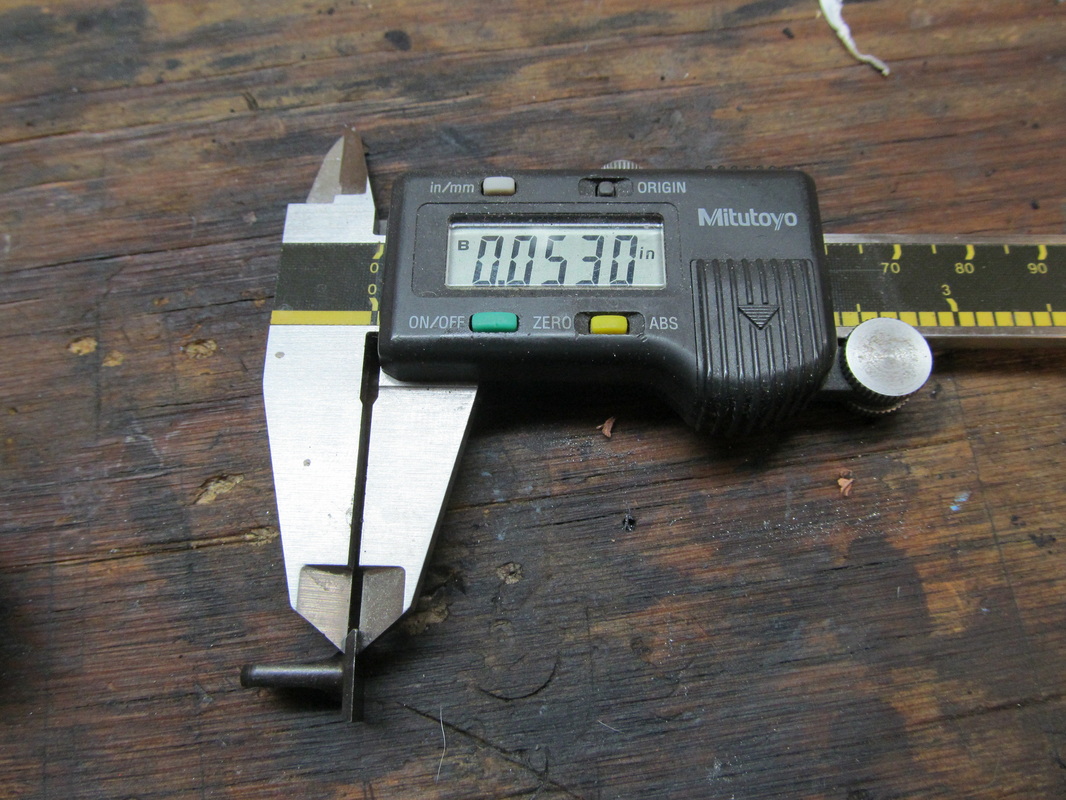
Measuring the thickness of the sight base. Ours is .053" thick.
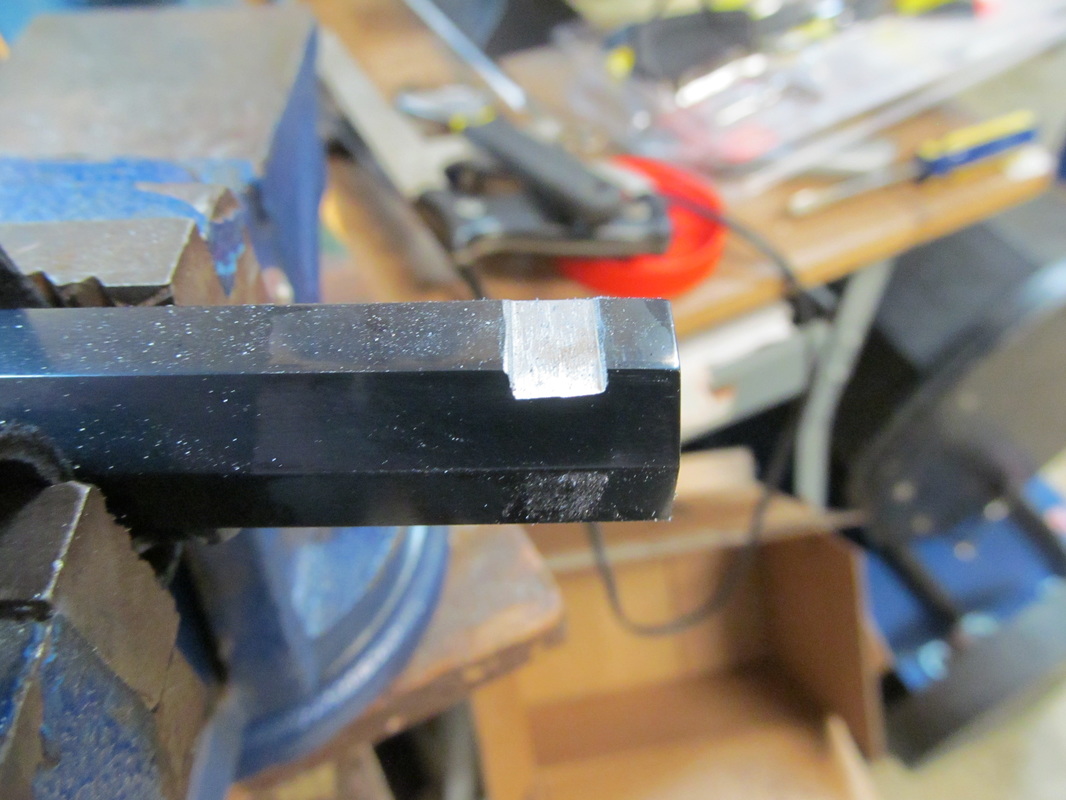
Now we can start cutting the slot. I recommend using a small file to get started. You can move up to a bigger file for more aggressive cutting once you have the slot good and started. Go slowly, measuring your progress frequently. You can't add metal back!

|
|
Filing the slot. Check your measurements often.
Once you have the slot filed out to the correct depth and width, it's time to cut the undercut using our modified 3-sided file. Use the smooth-side of the file face-down. The idea is to cut only into the undercut, not increase the depth of the slot. Work carefully, frequently checking the fit of the dovetail. It is helpful to cut a very tiny chamfer on the edges of the sight where it engages the dovetail slot to help get it started. Just knock off the corner is all you want to do.
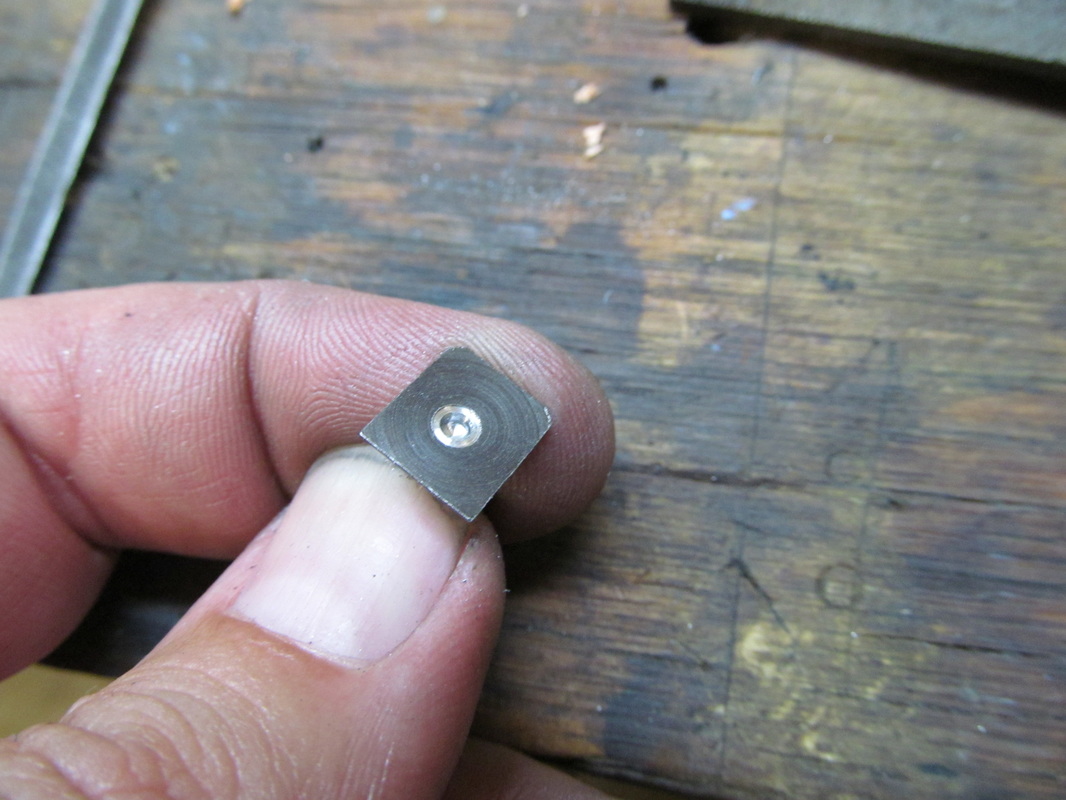
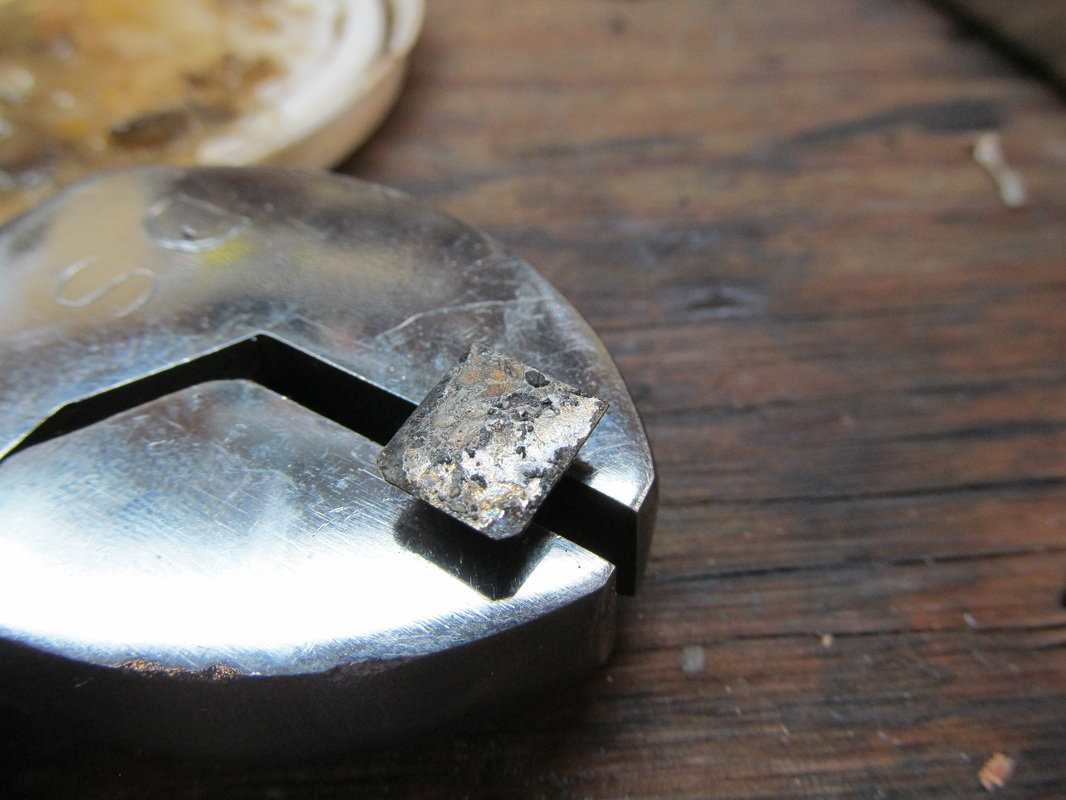
Before you install the sight, we want to drill a small pocket on the bottom of the sight that we can fill with solder. We do this so that once we have the sight where we want it, we can heat the post with a torch until the solder runs free into the slot and semi-permanently affixes the sight in place.
A crescent wrench is handy to hold the sight upside-down for drilling. Drill a small pocket into the base of the sight. Be careful not to drill too deeply or you will weaken the post.
Pocket drilled for solder.
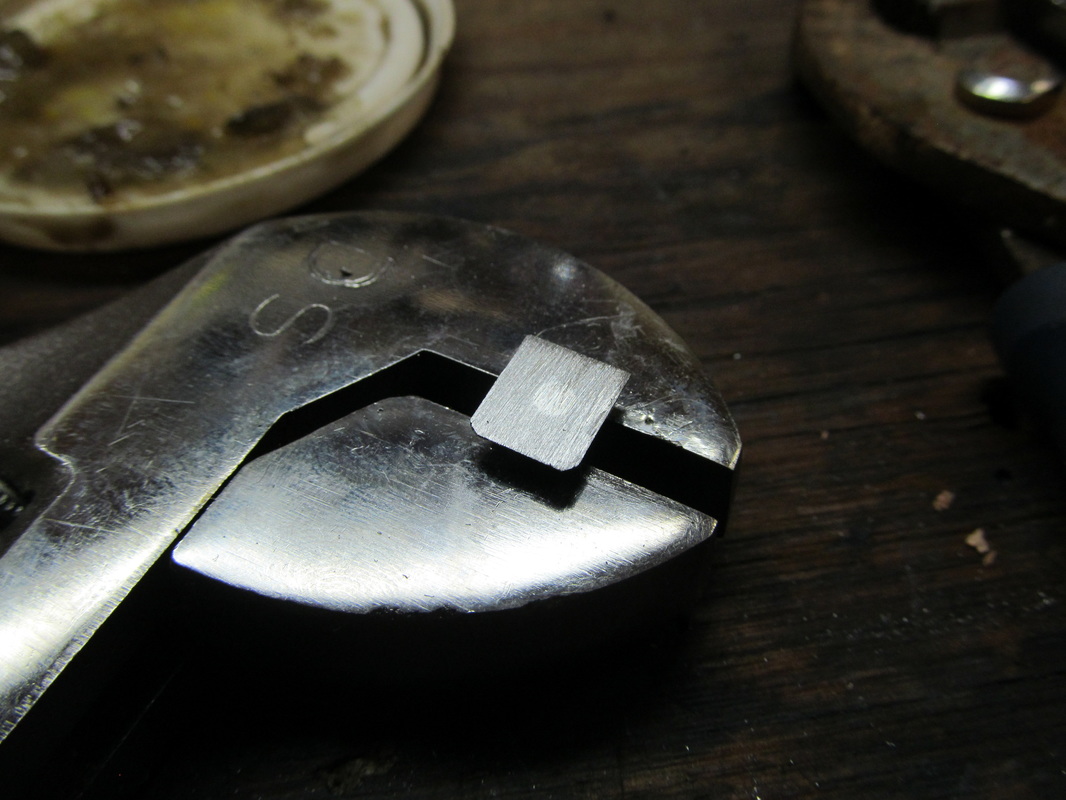
After you have drilled the pocket, file or sand the bottom of the sight until you have exposed bare metal. Then flux the bottom of the sight, heat it with a torch, and flow silver solder all over the bottom of the sight base. After it cools, file the bottom of the sight base down flush again until you can just make out your pocket full of solder.
Once again a crescent wrench is handy for holding the sight while soldering.
Once again a crescent wrench is handy for holding the sight while soldering.
|
|
Applying solder to the base of the sight.
Now we are ready to drive the sight into its slot. Once the slot is just wide enough that the sight will stick in place with finger pressure, carefully start tapping it into place. A piece of brass makes a nice punch to help keep from marring the sight or the barrel. A bit of oil can help. Go slowly and check your work.
I did not remove the gun from my vice and look under the sight until I had already driven it home; then I noticed daylight under the sight. The slot should have been cut a little deeper in the undercut at the front of the barrel. As a result the metal lifted up a bit at the front of my dovetail. When the solder melts it should fill the gap under the barrel.
I did not remove the gun from my vice and look under the sight until I had already driven it home; then I noticed daylight under the sight. The slot should have been cut a little deeper in the undercut at the front of the barrel. As a result the metal lifted up a bit at the front of my dovetail. When the solder melts it should fill the gap under the barrel.
|
|
Driving the sight into place.
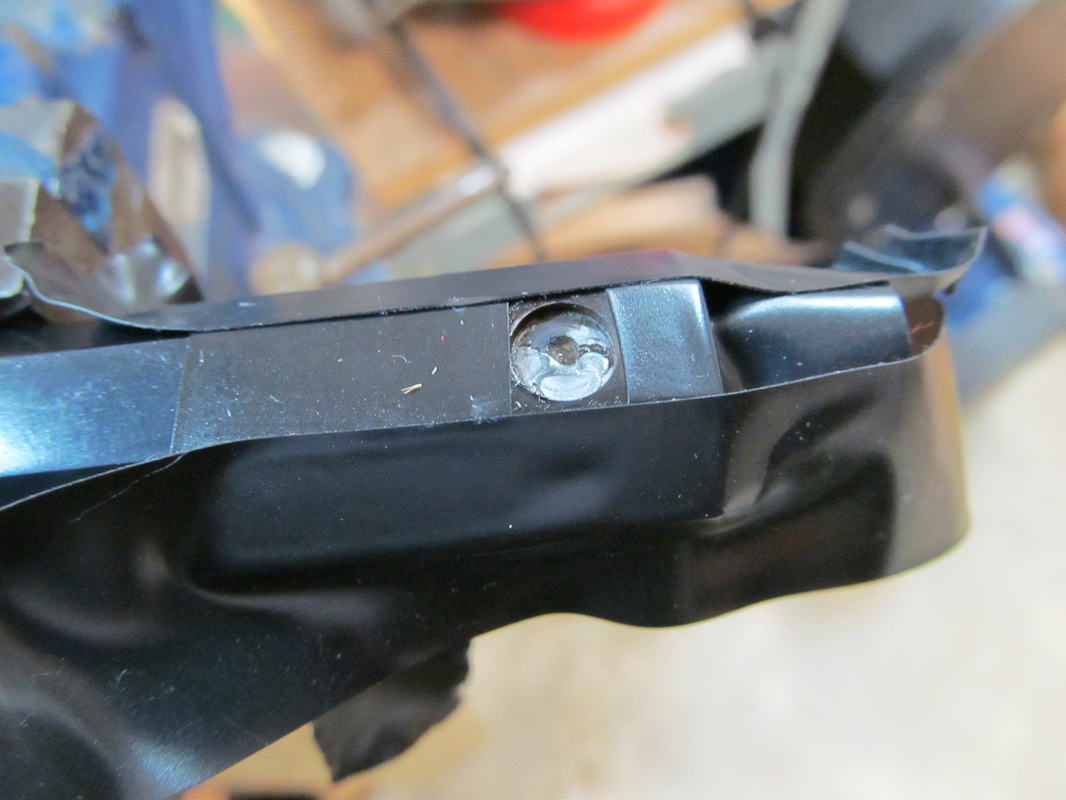
The sight in place!
As you can see, I did not cut the front of the slot quite deep enough. As a result it turned up the metal slightly at the front of the slot.
I have filed the post a bit thinner, and next I will go to the range and adjust the sight as needed to adjust the windage to point of aim. Then I will swirl the front of the barrel in acetone to degrease everything, and then heat the front sight until the solder flows, locking the sight in place.
Then I will carefully file the sight base to match the barrel flats, and polish, and touch up the bluing.
All in all, I'm fairly pleased with my first attempt. It is definitely secure and will definitely be functional. It could have been a little cleaner, but it's not terrible for a first attempt.
